Inspiring Rustic Outdoor Shower Ideas for Your Backyard Escape
Get ready to rinse off under the stars with these rustic outdoor shower designs that bring the spa to the great outdoors!
You crave a refreshing outdoor oasis, but your rustic outdoor shower design is lacking, with awkward layouts and uninviting aesthetics. Your alfresco bathing space needs a rustic revival.
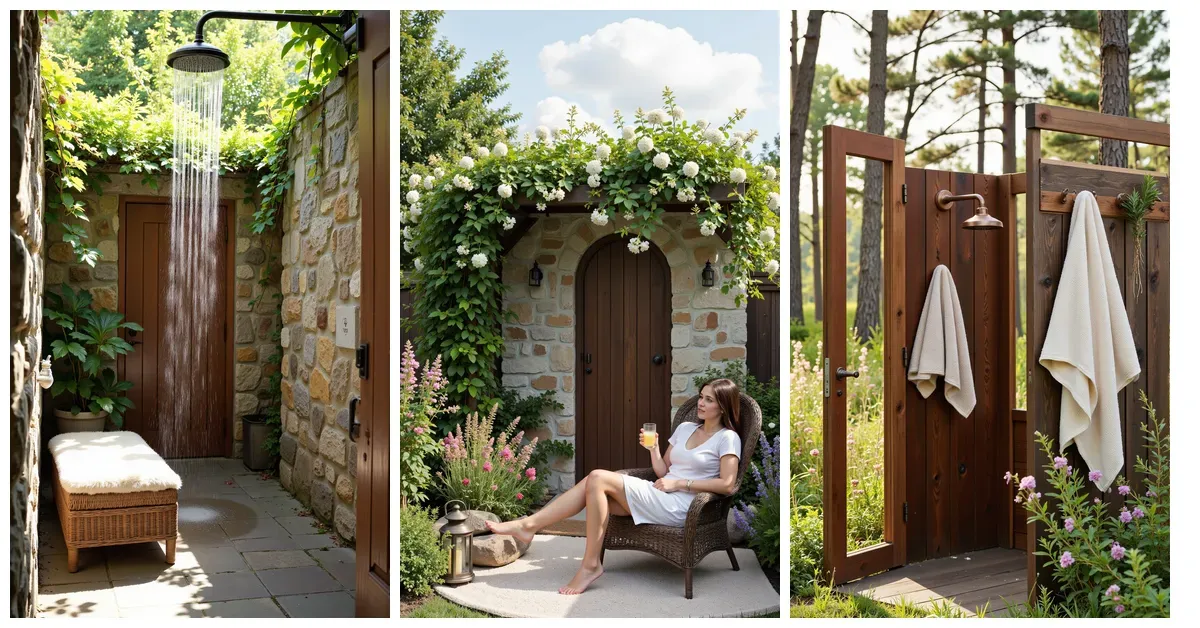
Create a serene outdoor oasis with rustic shower designs that bring the beauty of nature to your bathing routine. Inspire your next outdoor renovation with these unique ideas.
Embracing the Beauty of Nature
Immersing yourself in the great outdoors can be a truly transformative experience, and what better way to do that than by bringing the beauty of nature right into your daily routine? From stargazing showers to carefully crafted outdoor oases, we’ll show you how to make the most of your natural surroundings.
Bathing Under the Stars: How Embracing Nature Elevates Your Rustic Outdoor Shower Experience
- Blissful Connection: You’ll feel more connected to the natural world and its rhythms.
- Stress Relief: The calming atmosphere of nature helps reduce stress and anxiety.
- Authentic Experience: Embracing nature adds an authentic touch to your outdoor shower experience.
- Sense of Freedom: A rustic outdoor shower design lets you escape the confines of indoor spaces.
Designing Your Rustic Outdoor Shower: A Step-by-Step Guide
-
Selected a Secluded Area
This allowed for a more intimate connection with nature. -
Designed a Rain Showerhead
This added a touch of luxury to the rustic experience. -
Added Natural Materials
This brought warmth and texture to the outdoor space. -
Incorporated Greenery
This enhanced the natural ambiance and created a sense of serenity.
Now that we’ve been inspired by the natural beauty that surrounds us, it’s time to think about where to place your rustic outdoor shower to truly connect with the great outdoors.
Choosing the Perfect Location
Finding the perfect spot for your rustic outdoor shower is all about setting the tone for a serene and rejuvenating experience. Let’s explore how to choose a location that will make your outdoor shower feel like a secluded oasis, tailored to your unique surroundings and style.

Setting the Scene: Why Location Matters for a Dreamy Rustic Outdoor Shower
- Seclusion and Serenity: You’ll enjoy a peaceful, private outdoor space to unwind and recharge.
- Natural Beauty: You can seamlessly integrate your outdoor shower into the surrounding landscape.
- Energy Efficiency: A well-placed outdoor shower can reduce your water heating costs and energy consumption.
- Year-Round Enjoyment: You’ll be able to use your outdoor shower during warm weather, without feeling exposed or vulnerable.
Locate Your Dream Outdoor Shower Spot
-
Identified the Property’s Topography
This involved studying the land’s natural slope and drainage patterns to inform the design. -
Considered Local Building Codes and Regulations
This step ensured compliance with zoning laws and building codes for the outdoor shower. -
Chose a Secluded yet Accessible Spot
This decision balanced privacy with ease of access to the shower from the main house. -
Accounted for Sun and Shade Patterns
This helped determine the optimal location for the shower to minimize harsh sun exposure.
Now that you’ve chosen the perfect location for your rustic outdoor shower, it’s time to think about the elements that will bring it all together – starting with the shower fixtures that will add a touch of rustic charm to your space.
Selecting Rustic Shower Fixtures
As you curate the perfect outdoor oasis, don’t overlook the shower fixtures – a thoughtful selection can instantly infuse your space with rustic charm. From authentic accents to functional must-haves, we’ll walk you through the process of choosing the perfect rustic shower fixtures for your haven.
Adding Rustic Shower Fixtures Brings Authenticity and Charm to Your Outdoor Oasis
- Adds Warmth: Brings a cozy, inviting feel to your outdoor space.
- Enhances Curb Appeal: Elevates the aesthetic of your home’s exterior with a rustic touch.
- Creates a Sense of Relaxation: Helps you unwind and connect with nature in a peaceful setting.
- Complements Natural Surroundings: Blends seamlessly with the outdoors, creating a harmonious atmosphere.
Selecting Rustic Shower Fixtures: A Step-by-Step Guide
-
Choose Rustic Shower Fixtures
Select fixtures that complement the natural surroundings and fit the rustic theme. -
Consider Material Options
Select fixtures made from materials like copper, bronze, or reclaimed wood for a rustic look. -
Evaluate Fixture Functionality
Choose fixtures that provide the necessary water pressure and flow for a comfortable shower experience. -
Install Fixtures with Care
Follow the manufacturer’s instructions to ensure proper installation and avoid any water damage or leaks.
Now that you’ve selected the perfect rustic shower fixtures to bring a touch of the great outdoors to your bathroom, it’s time to think about creating a truly immersive experience with a rain showerhead oasis that will transport you to a serene natural setting.
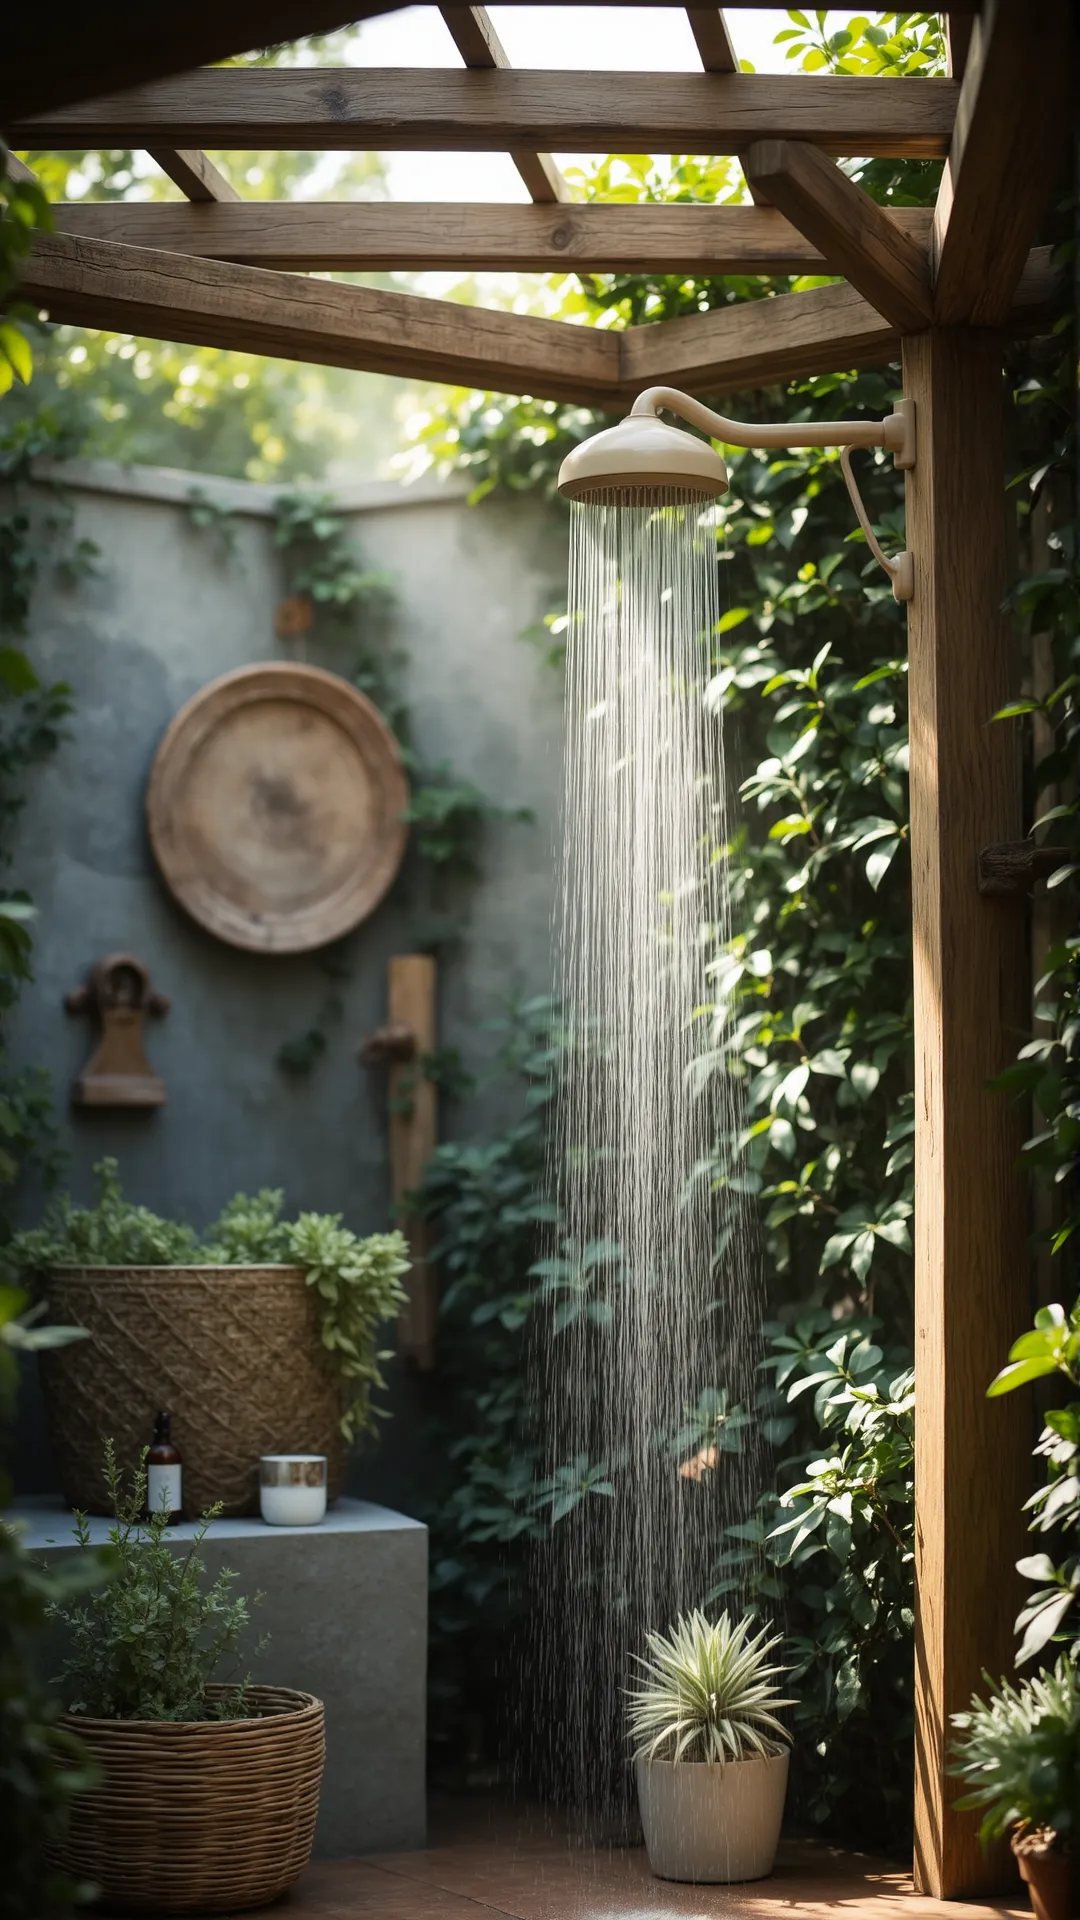
Designing a Rain Showerhead Oasis
Imagine stepping into your own outdoor oasis, where the soothing sounds of rain and the warmth of the sun come together in perfect harmony – all thanks to a show-stopping rain showerhead that elevates your outdoor space from ordinary to extraordinary. Let’s dive into how you can make this serene retreat a reality!

Transforming Your Outdoor Oasis with a Rain Showerhead: Where Rustic Meets Refreshing
- Elevated Outdoor Experience: Creates a luxurious, spa-like atmosphere in your own backyard.
- Water Conservation: Helps you save water while still enjoying a refreshing outdoor shower.
- Nature Integration: Blends seamlessly with your surroundings, bringing the outdoors in.
- Personal Expression: Allows you to add your unique style and personality to your outdoor oasis.
Designing a Rain Showerhead Oasis: Step-by-Step Guide
-
Selected a Rustic Theme
This ensured the overall aesthetic and style of the rain showerhead oasis aligns with the outdoor space. -
Measured and Marked the Shower Area
This helped accurately determine the placement and size of the rain showerhead and surrounding features. -
Installed the Rain Showerhead
This provided a functional and enjoyable water experience, often enhanced by the rustic theme. -
Added Decorative Elements
This completed the oasis by incorporating plants, stones, or other natural elements to create a serene ambiance.
Now that you’ve added a luxurious touch with a rain showerhead oasis, it’s time to bring in the natural beauty of the outdoors with a look that’s reminiscent of the great outdoors. Let’s create a stunning natural stone look that will transport you to a serene mountain retreat, even in the midst
Creating a Natural Stone Look
To bring a sense of organic elegance to your outdoor shower design, consider embracing the timeless beauty of natural stone. By incorporating this earthy element, you can create a seamless transition between indoors and outdoors, and add a touch of rustic sophistication to your alfresco oasis.
Bringing the Outdoors In: Why a Natural Stone Look Elevates Rustic Outdoor Shower Design
- Timeless Elegance: Creates a classic, enduring look that won’t go out of style.
- Nature-Inspired Aesthetic: Evokes the feeling of being outdoors, even in your own backyard.
- Authenticity Boost: Gives your outdoor shower a genuine, earthy vibe that’s hard to replicate.
- Low Maintenance: Natural stone look can withstand the elements, requiring minimal upkeep.
Achieve a Rustic Look: Step-by-Step Guide to Creating a Natural Stone Finish
-
Choose a Suitable Natural Stone Option
Select a type of natural stone that complements the outdoor shower’s surroundings and style, such as fieldstone or bluestone. -
Mock Up the Design
Create a mockup of the natural stone look to visualize the final result and make any necessary adjustments before proceeding. -
Install the Natural Stone
Install the chosen natural stone material, ensuring a secure and level base, and consider adding a sealant for durability. -
Add Final Touches
Add any finishing touches, such as grout or decorative accents, to complete the natural stone look and ensure a cohesive design.
Now that we’ve achieved the organic, earthy feel of a natural stone look, it’s time to add a cozy touch to your rustic outdoor shower with a beautifully crafted wooden shower bench.
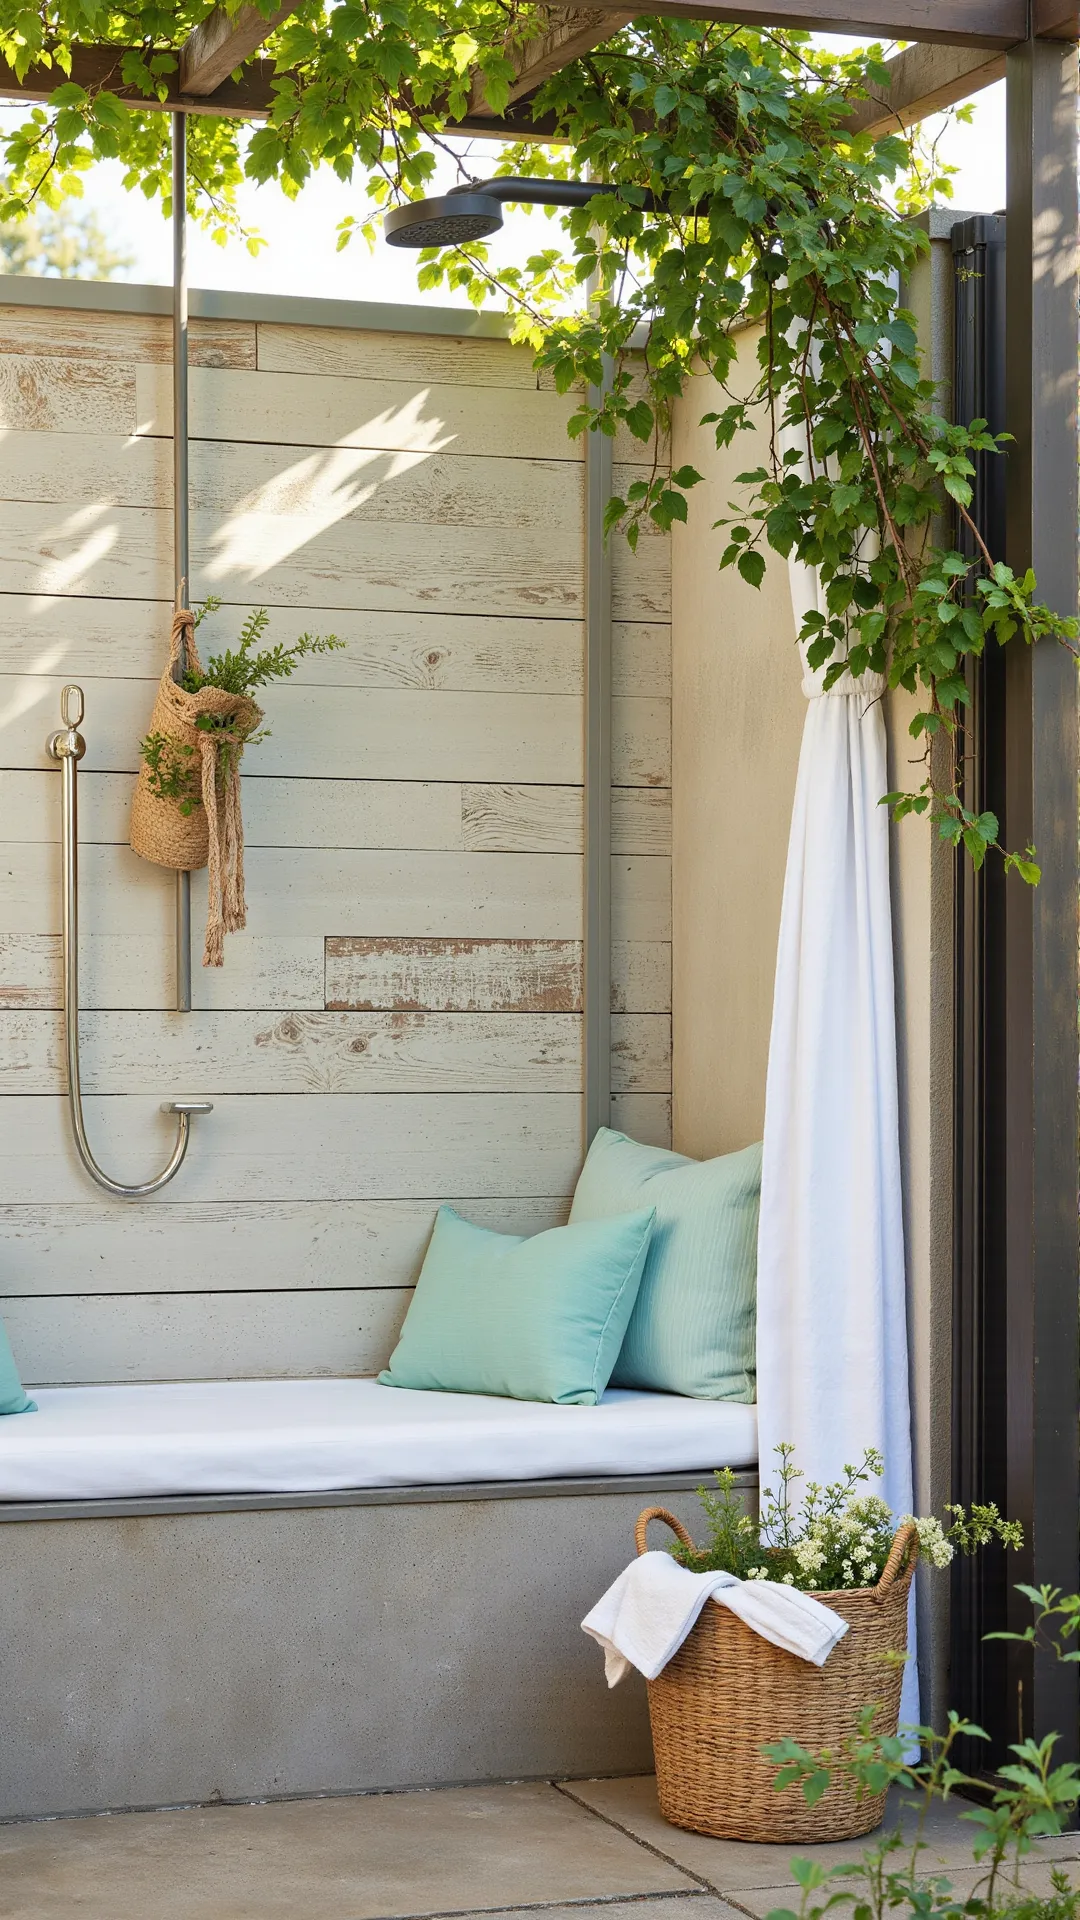
Adding a Wooden Shower Bench
Adding a wooden shower bench is a simple yet effective way to bring warmth and character to your shower space, transforming it into a relaxing oasis that invites you to linger. Whether you’re looking to elevate your outdoor shower or upgrade your indoor one, we’ve got you covered.

Elevate Your Outdoor Oasis: How a Wooden Shower Bench Brings Rustic Charm to Your Shower Sanctuary
- Practicality: Adds a convenient seating option for relaxing after a shower.
- Aesthetics: Enhances the rustic charm of your outdoor shower with a natural wood element.
- Safety: Provides a secure spot to sit, reducing the risk of slipping on the shower floor.
- Comfort: Offers a cozy spot to enjoy the outdoors while still being close to the shower.
Installing a Wooden Shower Bench in 5 Easy Steps
-
Measured the Shower Area
Determine the space where the bench will fit comfortably without obstructing the shower head or other features. -
Selected the Wood Type
Choose a durable, weather-resistant wood species suitable for outdoor use, such as cedar or cypress. -
Cut the Wood to Size
Use a saw to cut the wood into the required pieces for the bench, following the manufacturer’s instructions. -
Assembled the Bench
Combine the cut wood pieces according to the manufacturer’s instructions to create the shower bench.
Now that you’ve added a beautiful wooden bench to your rustic outdoor shower, it’s time to bring in some of the great outdoors itself. By incorporating lush greenery into your design, you can create a seamless transition between the natural surroundings and the shower area, making your outdoor oasis feel like a true
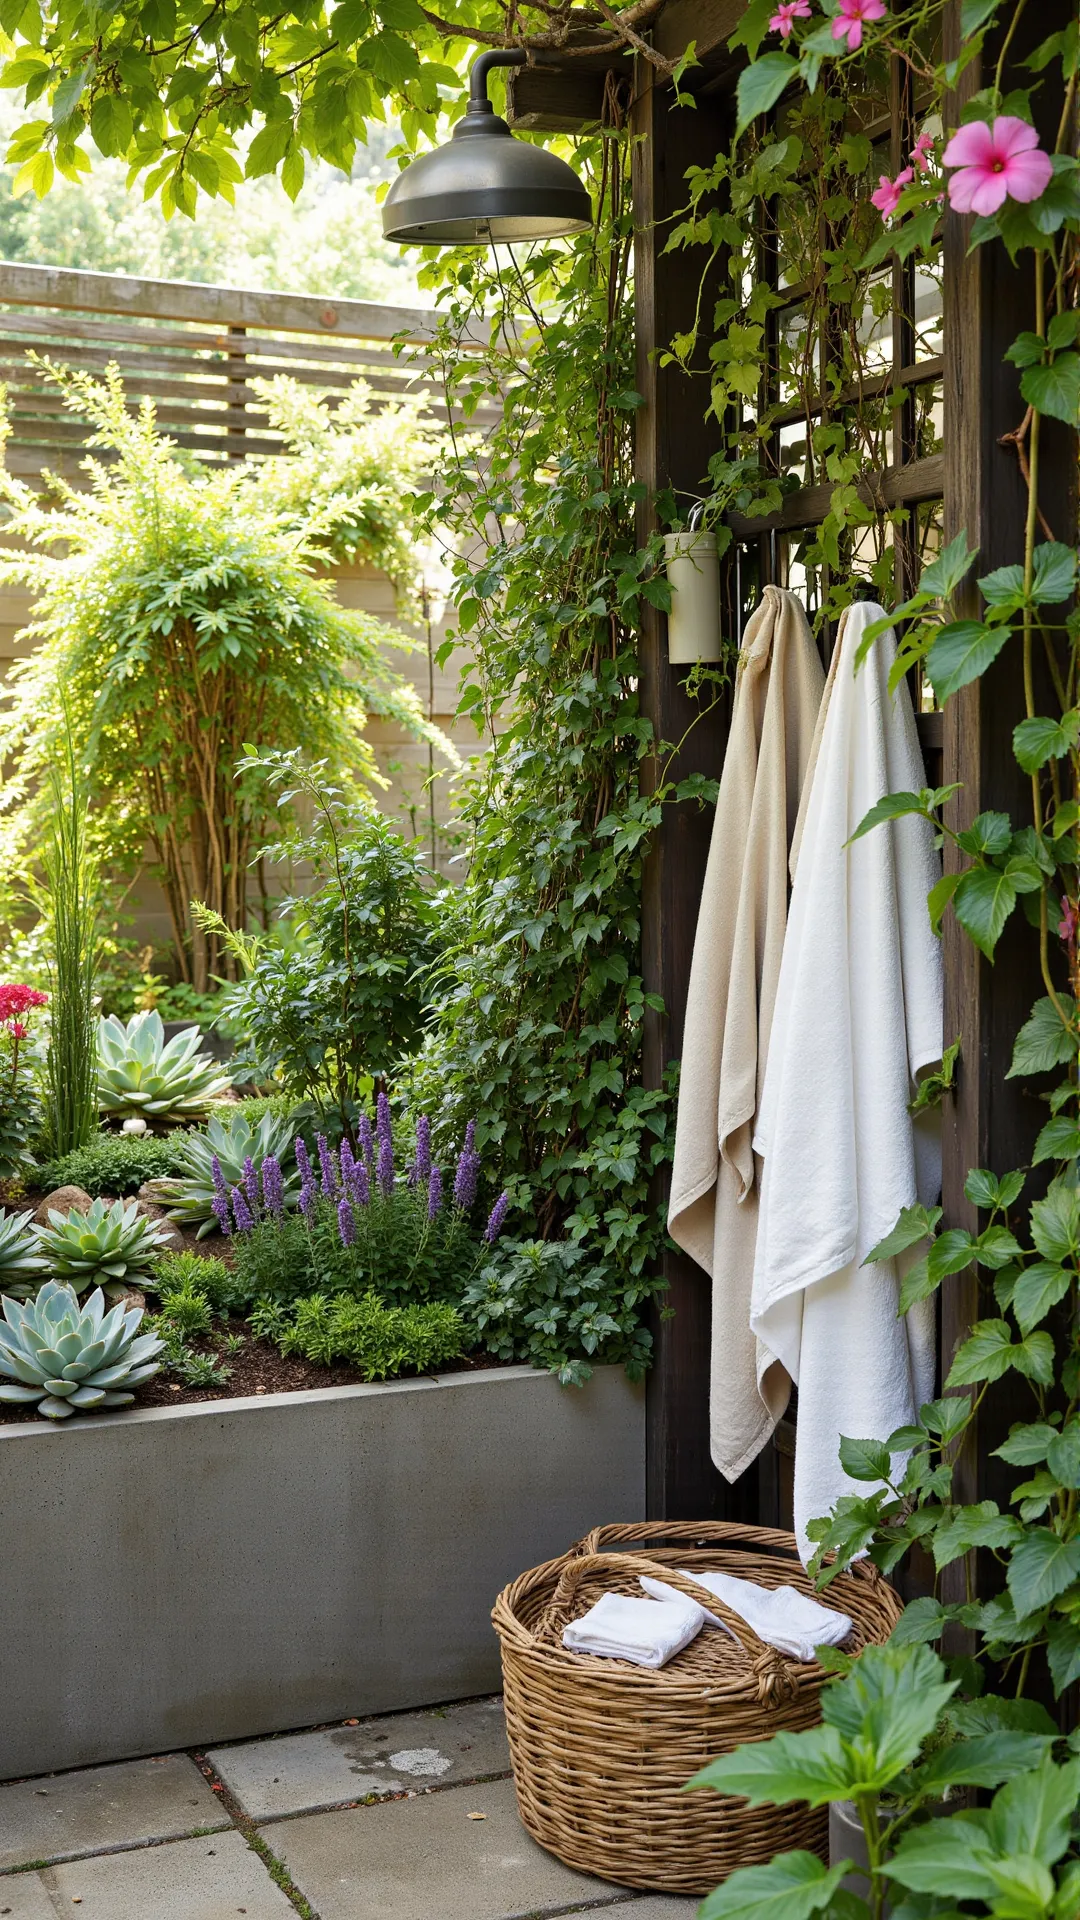
Incorporating Greenery for a Lush Feel
Incorporating lush greenery into your outdoor shower design is a game-changer – it instantly elevates the space and brings a sense of serenity. From adding a few strategically placed plants to creating a full-on jungle oasis, we’ll show you how to bring the outdoors in and make your shower feel like a secluded retreat.
Bringing the Outdoors In: How Lush Greenery Elevates Rustic Outdoor Shower Design
- Instant Oasis: Brings a sense of calm and tranquility to your outdoor space.
- Nature’s Ambiance: Creates a seamless blend of indoors and outdoors with lush greenery.
- Visual Interest: Adds depth and texture to your rustic outdoor shower design.
- Biophilic Boost: Connects you with nature, promoting well-being and relaxation.
Adding Greenery for a Lush Feel: A Step-by-Step Guide
-
Choose a Variety of Greenery
Select a mix of plants with different textures, shapes, and sizes to create a lush feel. -
Select a Water-Resistant Planter
Use a planter specifically designed for outdoor use to protect the plants from moisture and weather conditions. -
Add a Trellis for Climbing Plants
Install a trellis to provide support for climbing plants, such as ivy or clematis, to create a natural screen. -
Incorporate a Living Wall
Create a living wall using a modular planter system to add a touch of greenery to the outdoor shower area.
Now that you’ve brought the outdoors in with lush greenery, it’s time to add some rugged charm to your rustic outdoor shower design with a distressed finish that’s as unique as it is beautiful.
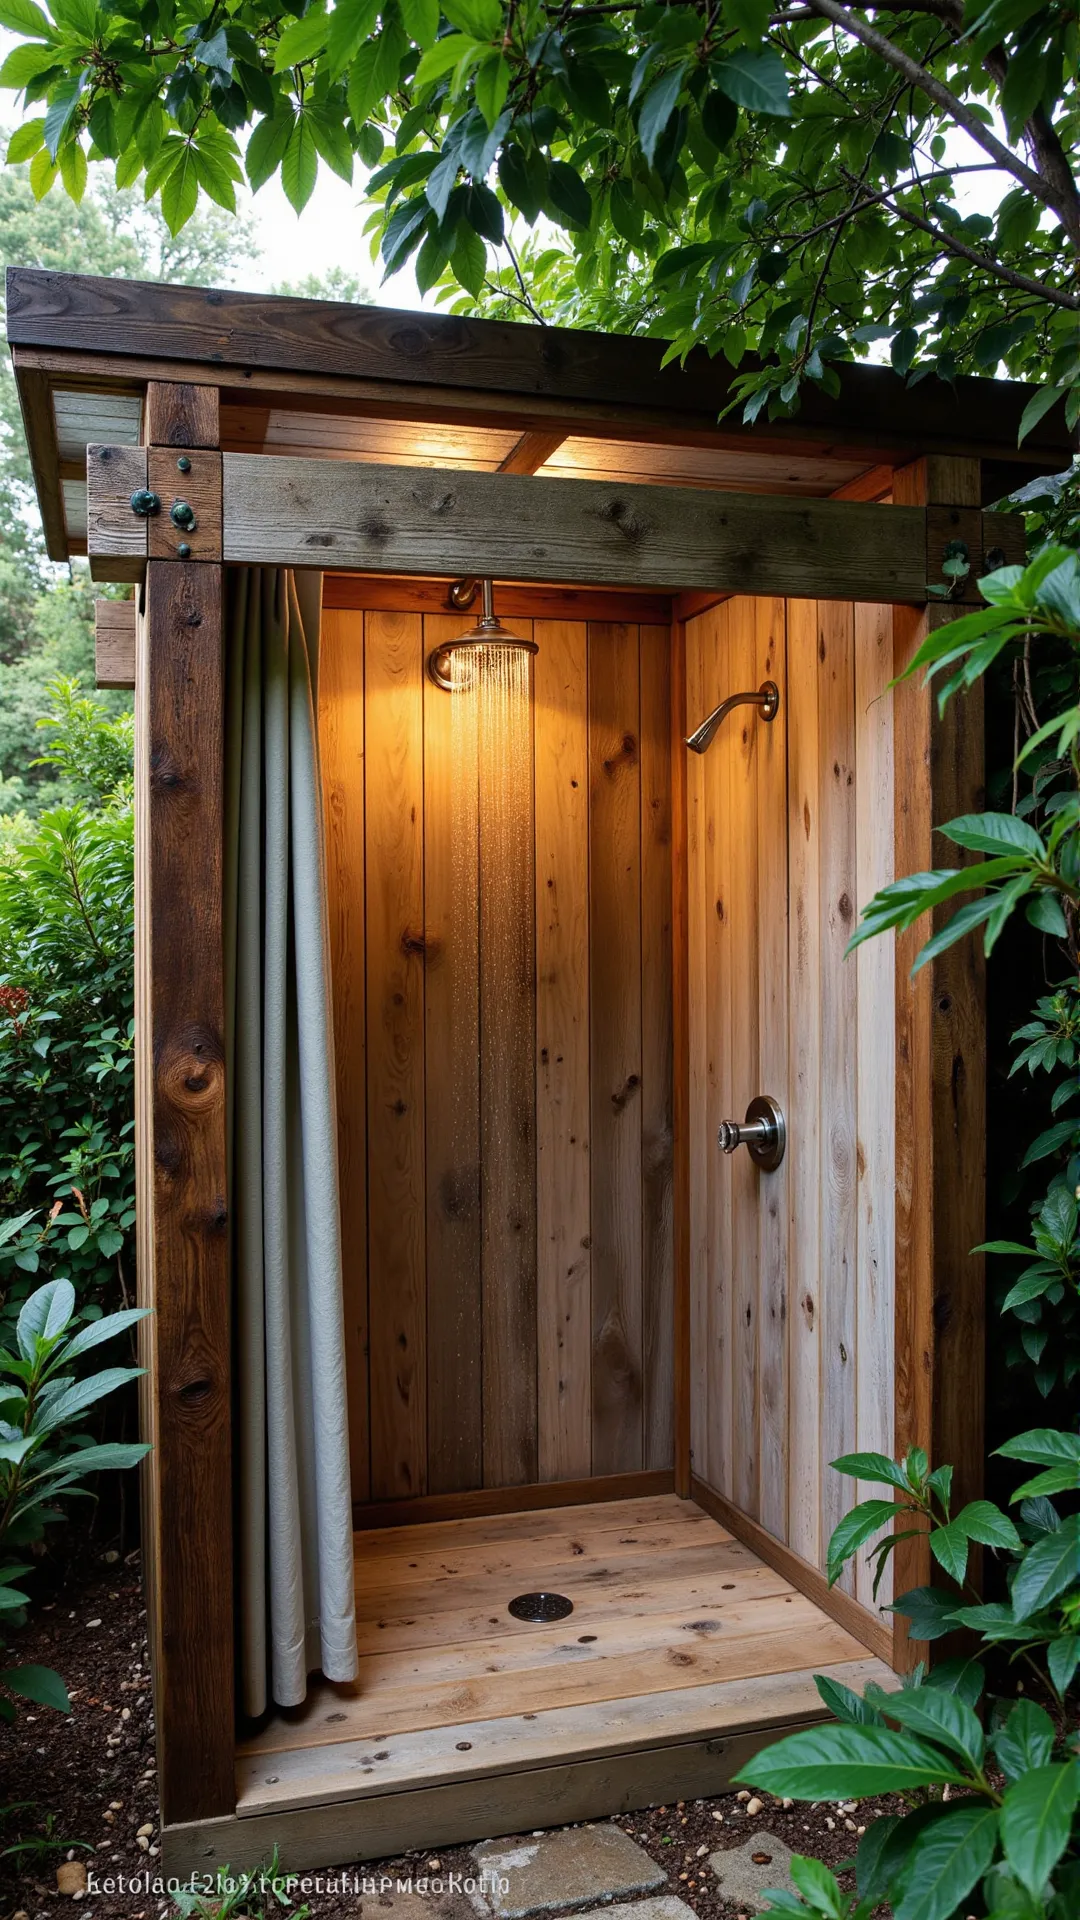
Using Reclaimed Wood for a Distressed Finish
Want to add a touch of authenticity and eco-friendly charm to your outdoor shower design? Using reclaimed wood with a distressed finish is a game-changer, bringing a sense of history and character to your space that’s hard to replicate with new materials.
Adding Reclaimed Wood for a Distressed Finish Elevates Rustic Outdoor Shower Design with Authenticity and Eco-Friendly Charm
- Unique Character: Adds one-of-a-kind charm to your outdoor shower space.
- Sustainable Option: Helps reduce waste and supports eco-friendly design choices.
- Weathered Beauty: Creates a beautifully distressed finish that’s perfect for a rustic look.
- Cost-Effective: Can be a budget-friendly alternative to new, high-end materials.
Achieving a Distressed Finish with Reclaimed Wood in 5 Easy Steps
-
Select the Reclaimed Wood
This involved choosing the perfect wood pieces for the distressed finish. -
Clean and Prepare the Wood
Removing dirt, grime, and old finishes to create a smooth surface for distressing. -
Distress the Wood
Using tools to create a worn, aged look, adding character to the wood. -
Apply a Protective Finish
Sealing the distressed wood to protect it from the elements and ensure durability.
Now that you’ve added a touch of rustic charm with your reclaimed wood shower surround, let’s talk about how to make your outdoor shower experience even more enjoyable with a solar-powered shower heater.
Installing a Solar-Powered Shower Heater
Ready to revolutionize your daily routine with a refreshing twist? Installing a solar-powered shower heater is a game-changer, allowing you to indulge in a warm, eco-friendly shower whenever you want, without breaking the bank or harming the environment.
Rethink Refreshing Routines with Solar-Powered Shower Bliss
- Eco-Friendly: Reduces your carbon footprint and reliance on non-renewable energy sources.
- Cost-Saving: Saves you money on energy bills and maintenance costs in the long run.
- Increased Property Value: Boosts your property’s value and appeal with a unique, high-tech feature.
- Enhanced Shower Experience: Provides a luxurious, warm shower experience even in cold climates.
Installing a Solar-Powered Shower Heater: A Step-by-Step Guide
-
Measured the Water Flow Rate
This will ensure the solar-powered shower heater can handle the required water flow for a comfortable shower experience. -
Installed the Solar Panels
This step involves mounting the solar panels on the roof or a suitable location to capture sunlight. -
Connected the Heating Element
This involves attaching the heating element to the water supply lines, ensuring proper water flow and temperature control. -
Tested the System
This final step ensures the solar-powered shower heater is working efficiently, providing a warm and comfortable shower experience.
Now that you’ve got a reliable solar-powered shower heater up and running, it’s time to think about how you’ll enjoy the warm waters in style – after all, a stunning view can make even the most relaxing shower feel like a luxury experience.
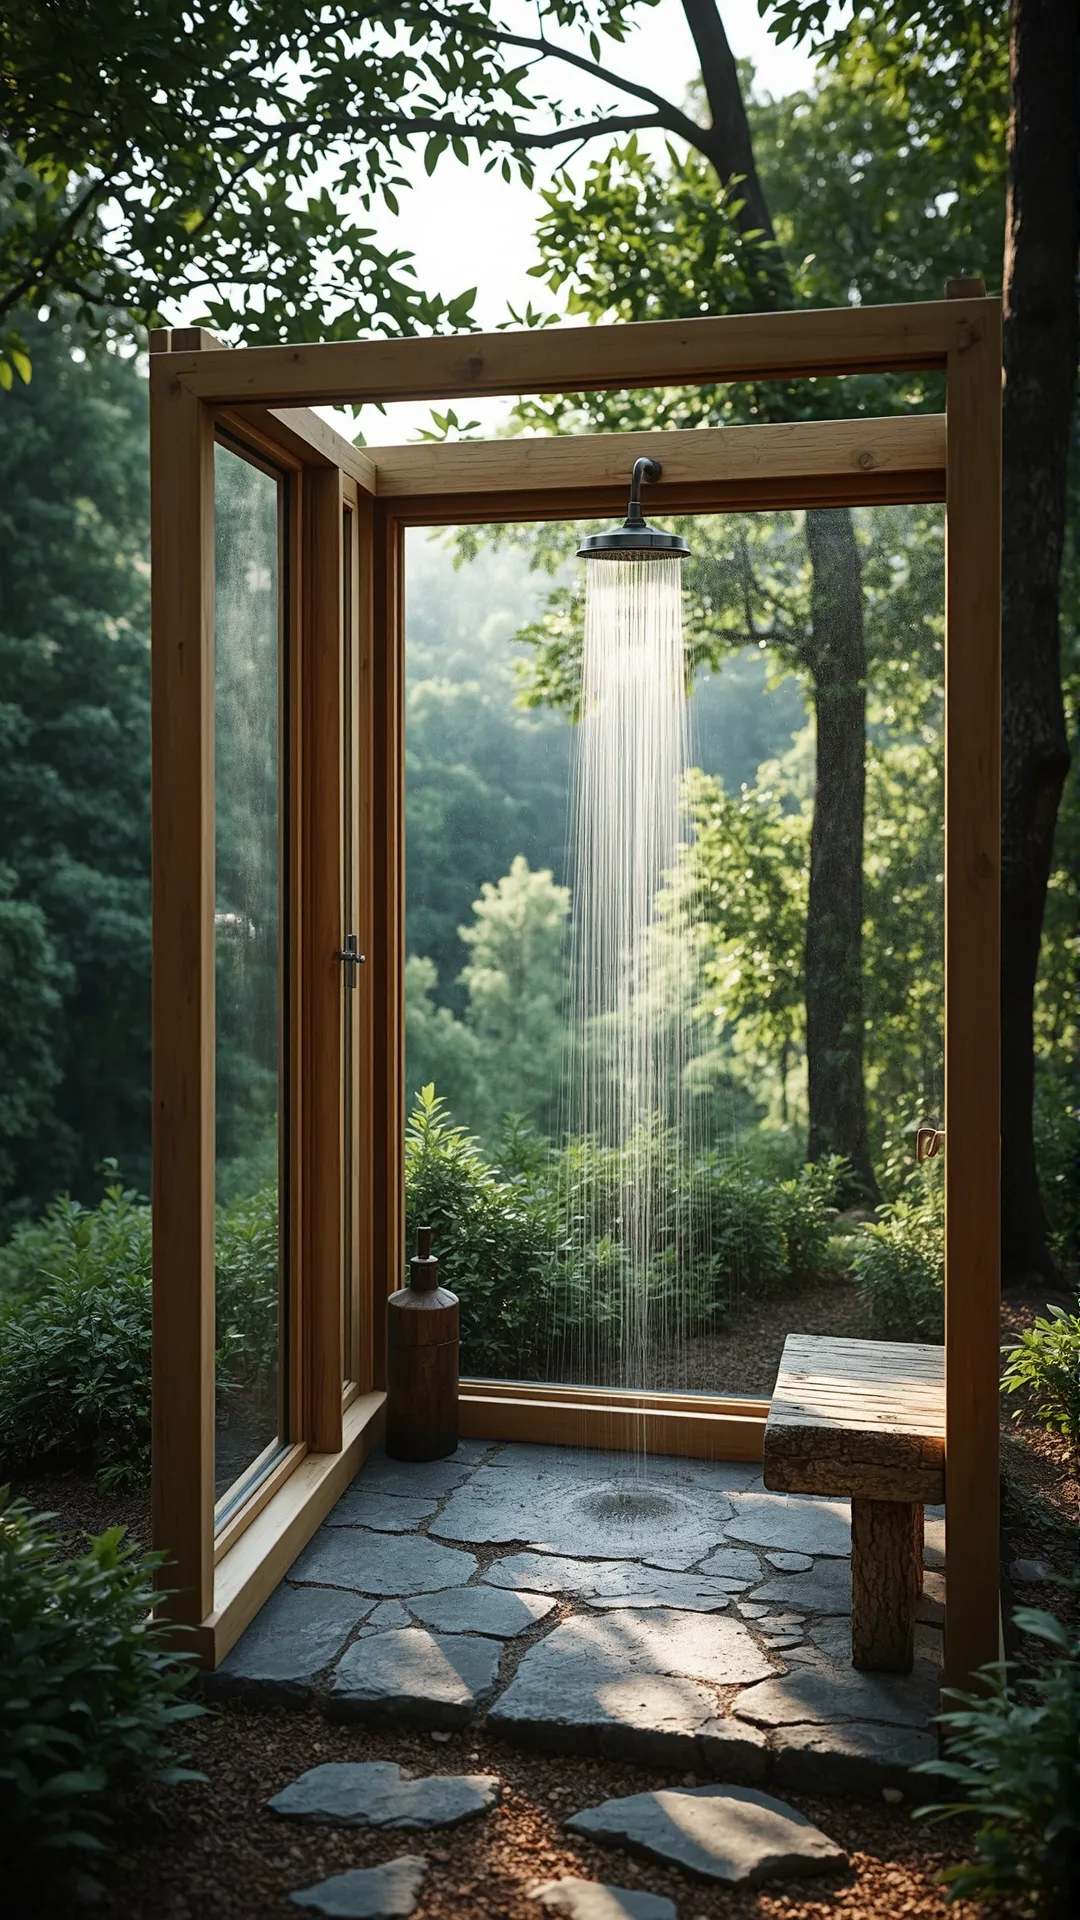
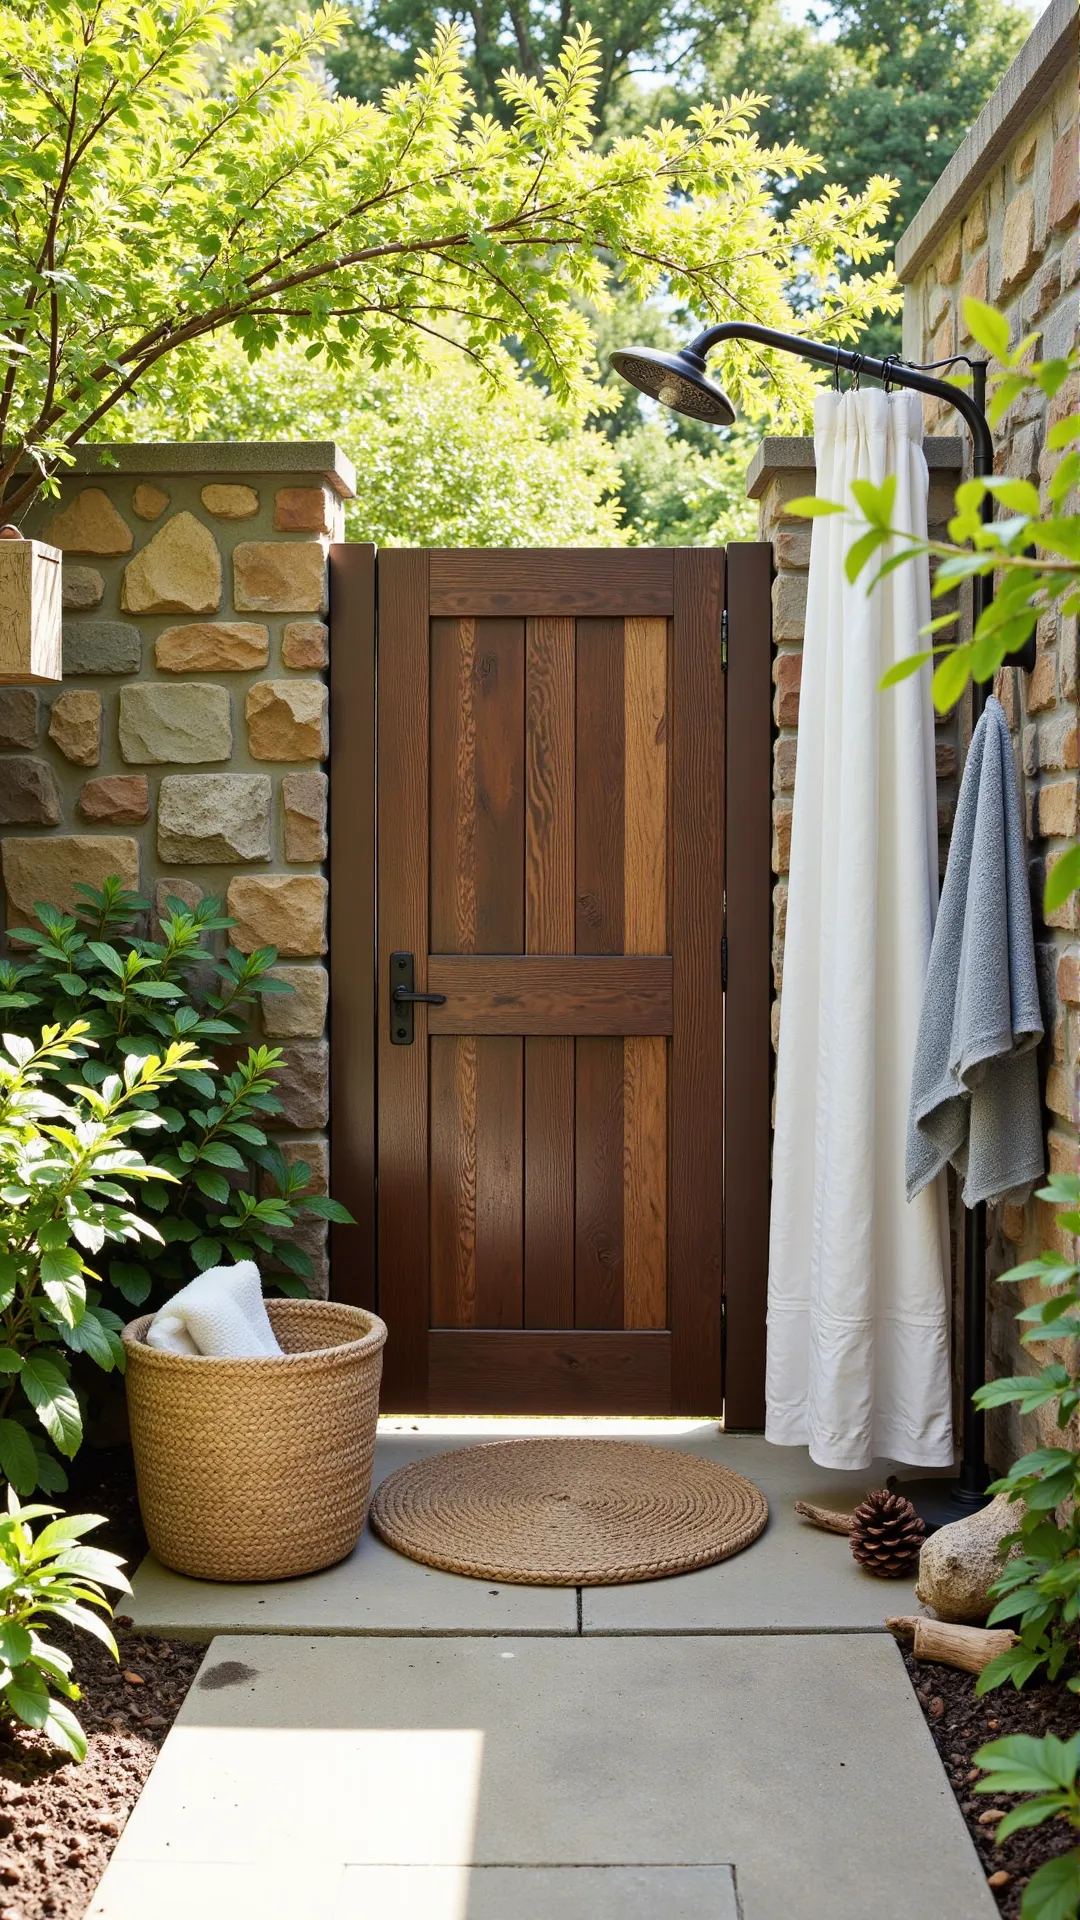
Designing a Shower Area with a View
Imagine stepping into your shower and being greeted by breathtaking views of nature, seamlessly blending the boundaries between indoors and outdoors. In this section, we’ll show you how to create a stunning shower area with a view that elevates your rustic oasis design to new heights.
Bringing the Outdoors In: How a Shower with a View Elevates Rustic Oasis Design
- Connects You to Nature: Blends the shower experience with the outdoors, creating a sense of freedom and tranquility.
- Boosts Mood: Exposure to natural light and views can elevate your mood and energy levels, making you feel more refreshed.
- Increases Property Value: A well-designed outdoor shower area with a view can be a major selling point for potential buyers.
- Enhances Your Connection to the Land: Creates a sense of ownership and intimacy with the property, making you feel more connected to the land.
Designing a Shower Area with a View: A Step-by-Step Guide
-
Selected a Suitable Location
This ensured the shower area would take full advantage of the view. -
Designed the Shower Structure
This involved choosing a frame style and materials that blended with the surrounding environment. -
Installed a Glass or Polycarbonate Wall
This provided an unobstructed view while maintaining privacy and safety. -
Added Comfort Features and Finishing Touches
This included installing a comfortable bench, a rain showerhead, and a natural stone floor.
Now that you’ve considered the perfect spot to place your outdoor shower, let’s think about how to add some tactile interest to the space with natural textures that bring depth and coziness to your rustic retreat.
Incorporating Natural Textures for Depth
Incorporating natural textures into your rustic outdoor shower design is a game-changer – it instantly adds depth, warmth, and a sense of the outdoors to the space. By thoughtfully combining different textures, you can create a visually interesting and inviting oasis that feels truly connected to nature.
Adding Natural Textures Brings Depth, Warmth, and a Sense of the Outdoors to Rustic Outdoor Shower Design
- Adds Organic Feel: Brings the outdoors in with a natural, effortless vibe that makes your shower feel like a serene oasis.
- Creates Visual Interest: Mixes and matches textures to add depth and visual intrigue, making your space feel more dynamic.
- Ties to Nature: Connects your shower to the surrounding landscape, creating a sense of harmony and oneness with the environment.
- Elevates Ambiance: Enhances the sensory experience with tactile sensations, making your shower feel more luxurious and indulgent.
Mastering Natural Textures for Depth in Rustic Outdoor Shower Design
-
Choose Natural Materials
Select materials that evoke a sense of rustic charm, such as reclaimed wood, stone, or weathered brick. -
Incorporate Textured Elements
Add depth with natural textures like woven baskets, jute rugs, or a stone wall to create visual interest. -
Add Organic Accents
Bring the outdoors in by incorporating natural elements like branches, pinecones, or driftwood into the design. -
Finish with a Natural Sealer
Protect the materials and maintain their natural look with a water-based sealer that enhances the texture and color.
Now that we’ve added depth to your rustic outdoor shower with natural textures, let’s create a secluded oasis that feels truly hidden from the rest of the world.
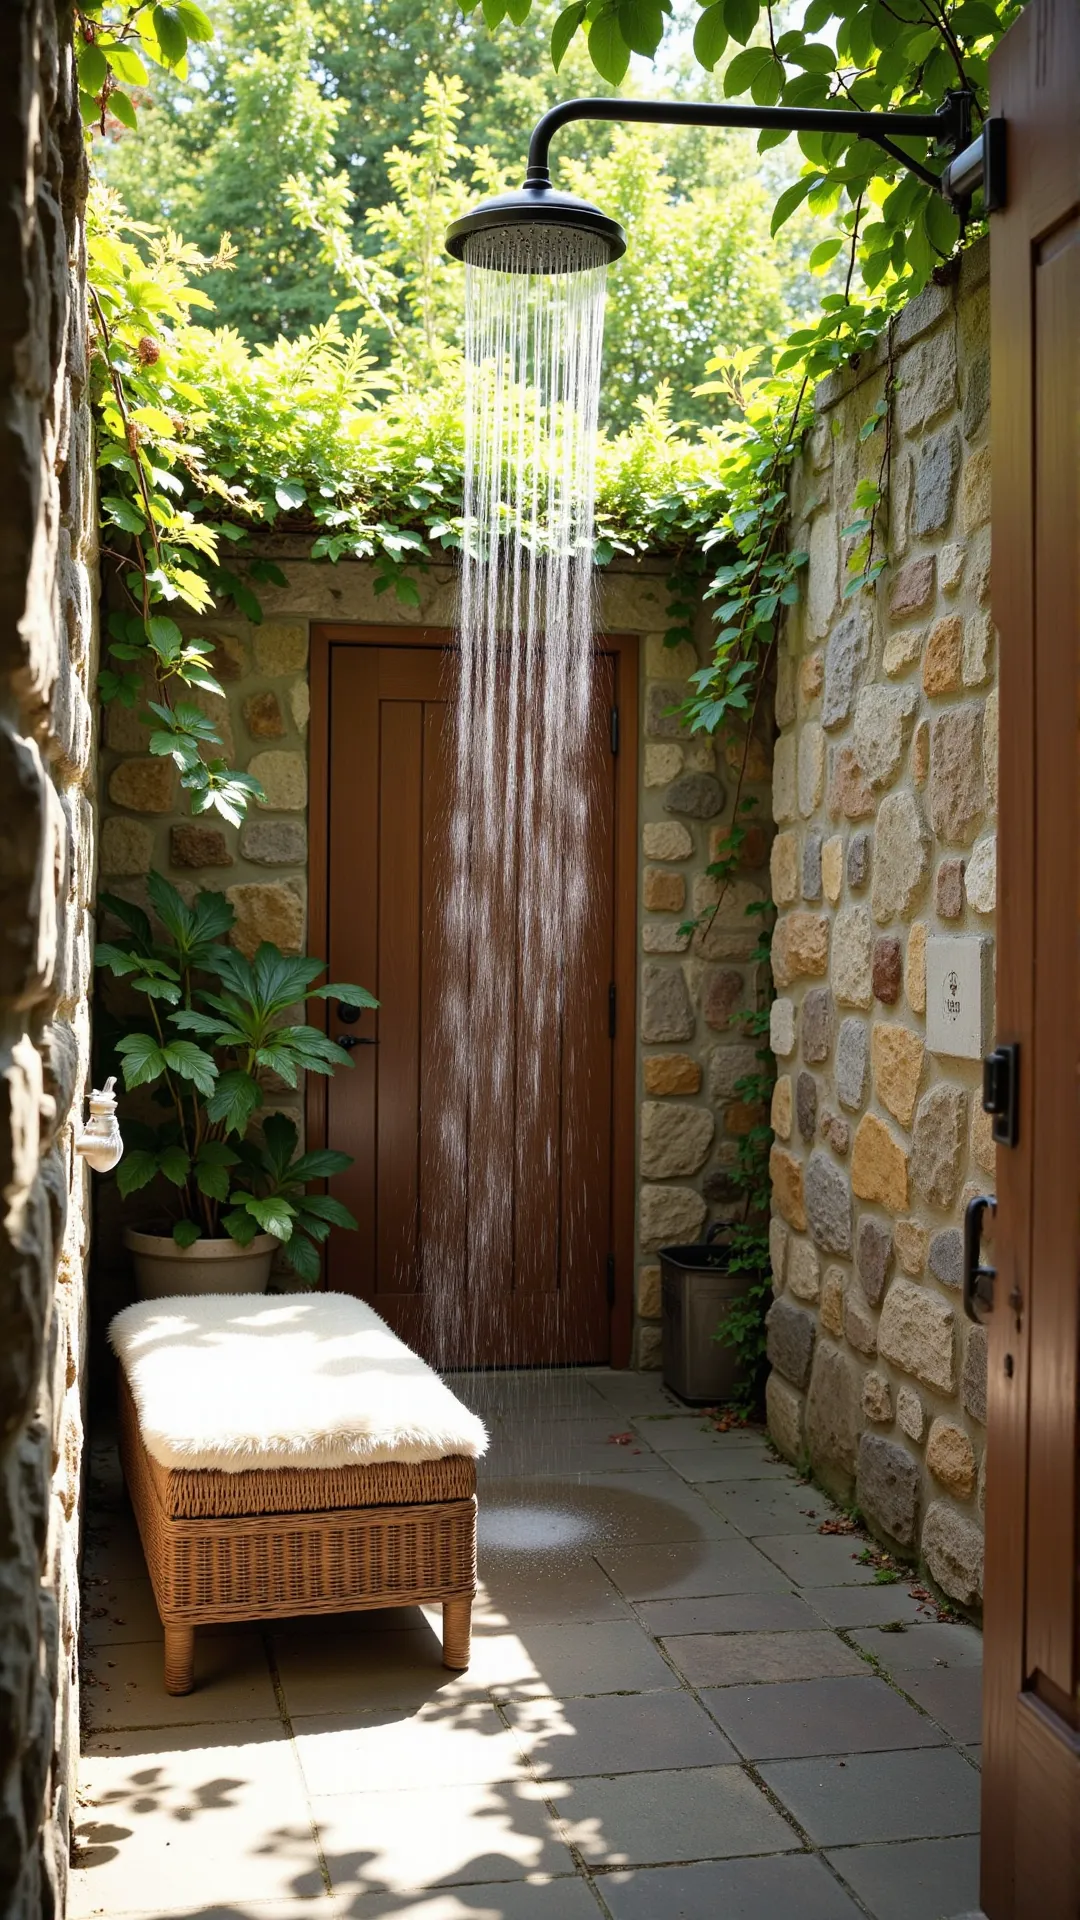
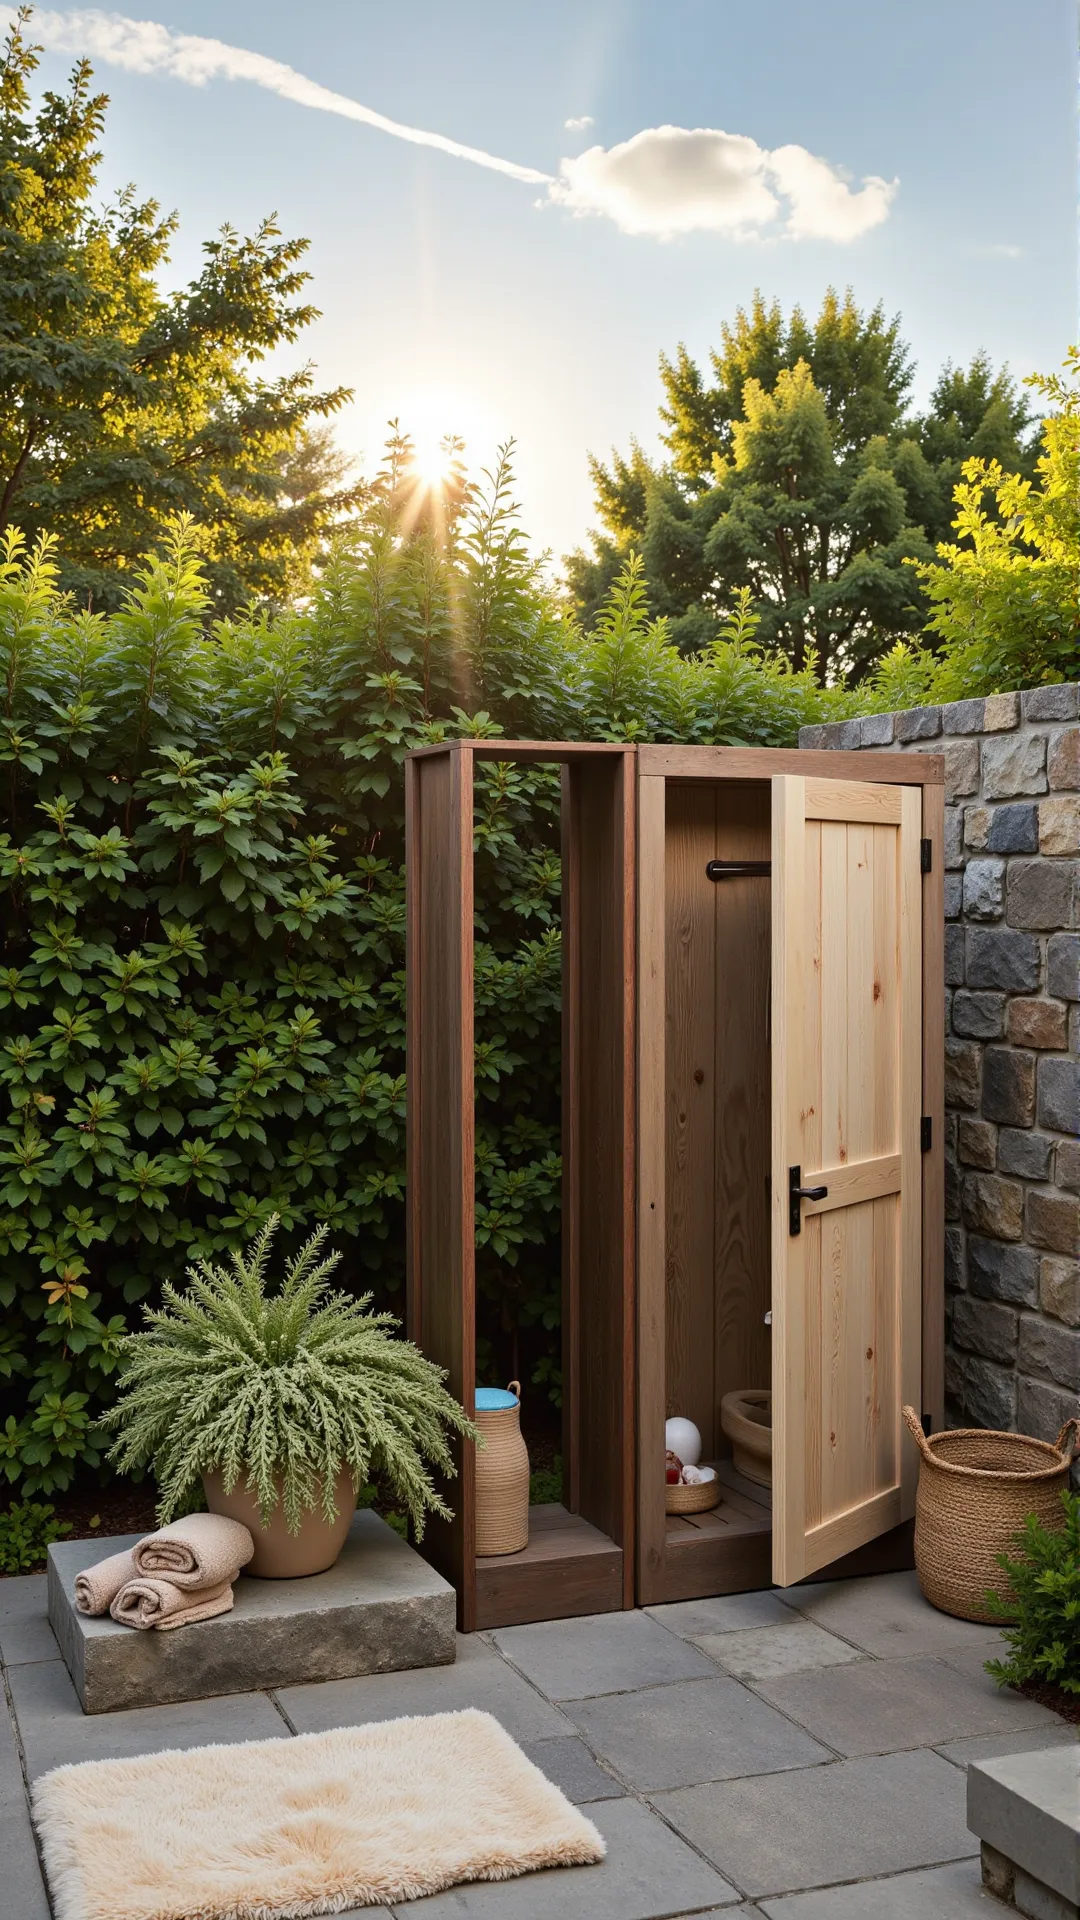
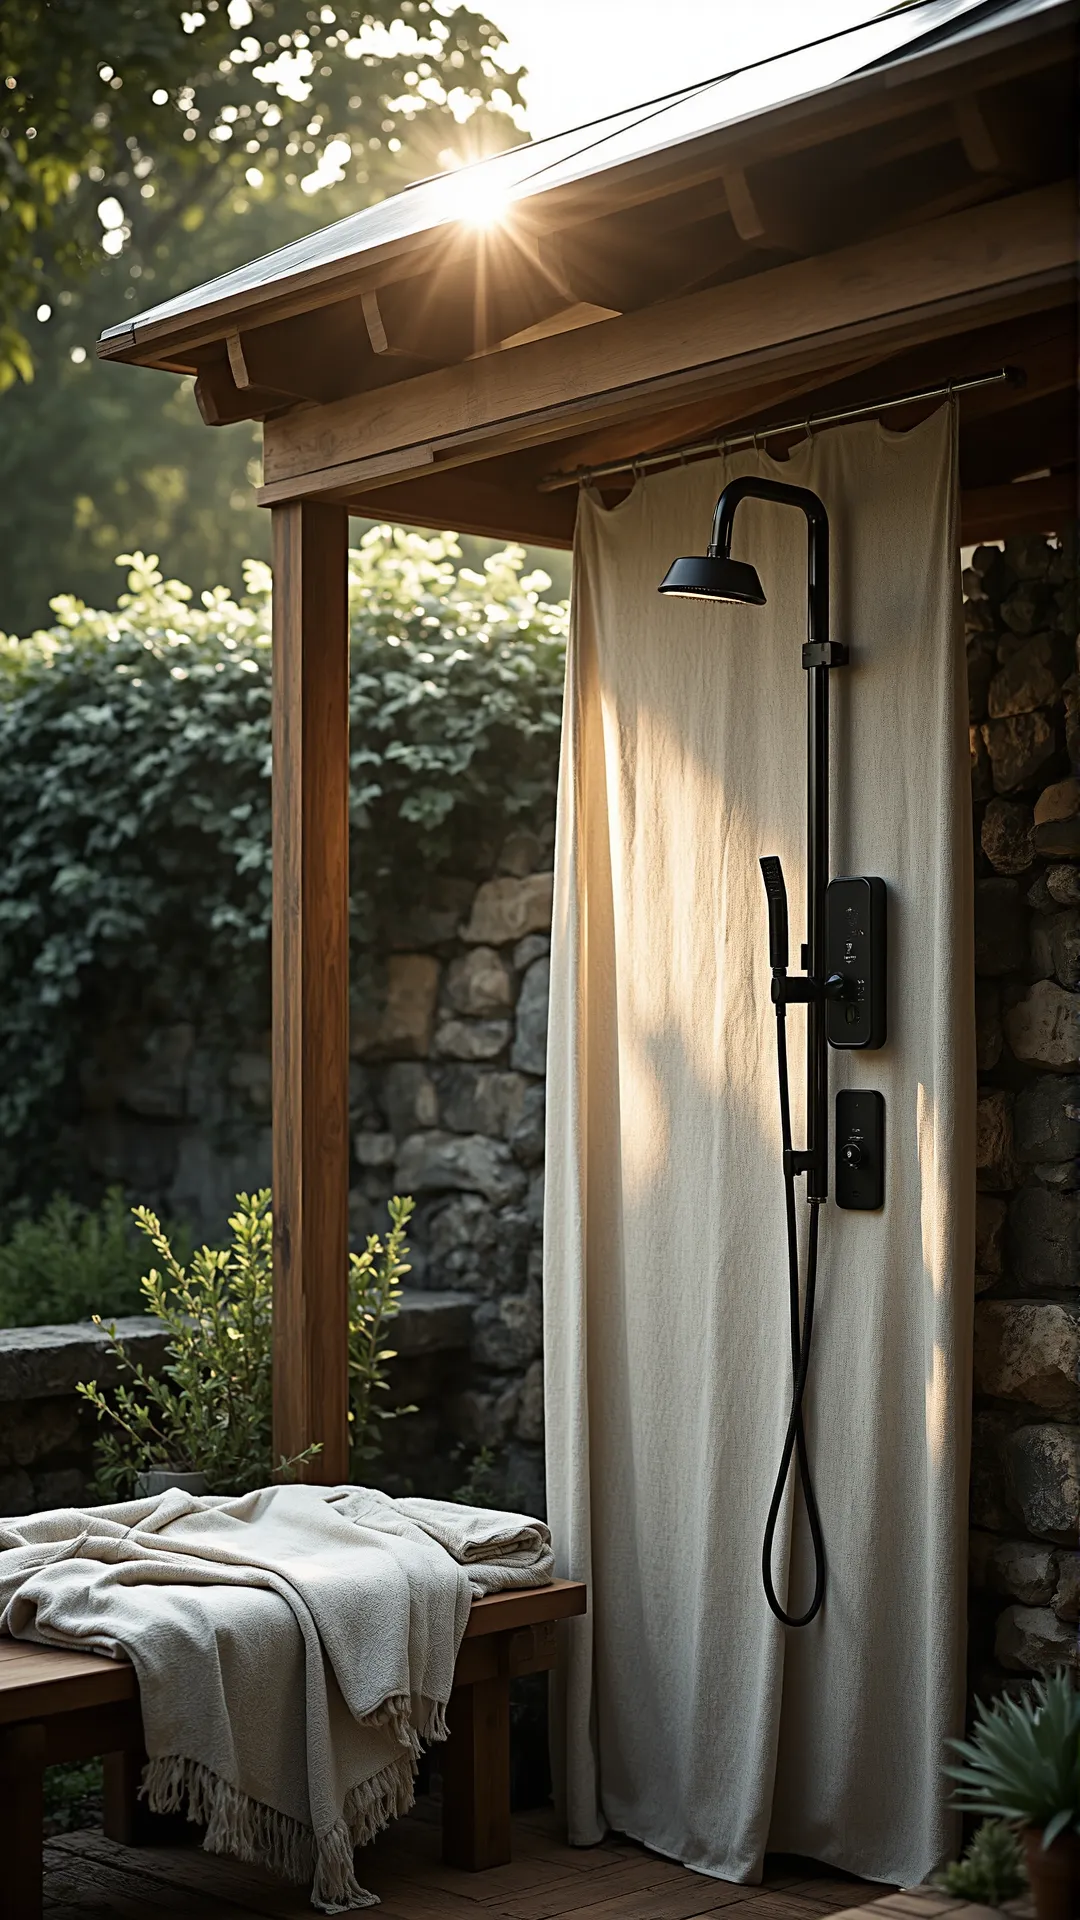
Creating a Secluded Shower Sanctuary
Imagine stepping into a serene outdoor shower, surrounded by nature’s splendor, where the stresses of everyday life melt away with each soothing drop. By crafting a secluded shower sanctuary, you can elevate your outdoor space into a tranquil retreat that rejuvenates both body and soul.
Escape to Bliss: How a Secluded Shower Sanctuary Elevates Rustic Outdoor Shower Design
- Escape from the World: Creates a peaceful retreat from the hustle and bustle of daily life.
- Rejuvenate Your Mind: Invigorates your senses with the fresh air and natural surroundings.
- Boost Your Mood: Lifts your spirits with the relaxing ambiance and calming atmosphere.
- Connect with Nature: Brings you closer to the outdoors and the beauty of nature.
Designing Your Secluded Outdoor Shower Oasis
-
Selected a Secluded Location
This ensured the shower would be private and shielded from the elements. -
Installed a Rain Showerhead
This added a luxurious touch and helped to create a spa-like atmosphere. -
Added Soft Lighting
This provided a warm and inviting ambiance, perfect for relaxation. -
Incorporated Natural Elements
This brought a sense of calm and connection to nature into the shower space.
Now that you’ve created a secluded shower sanctuary, it’s time to think about the structure that will bring it all together – and that’s where a rustic metal shower frame comes in, adding a touch of rugged charm to your outdoor oasis.
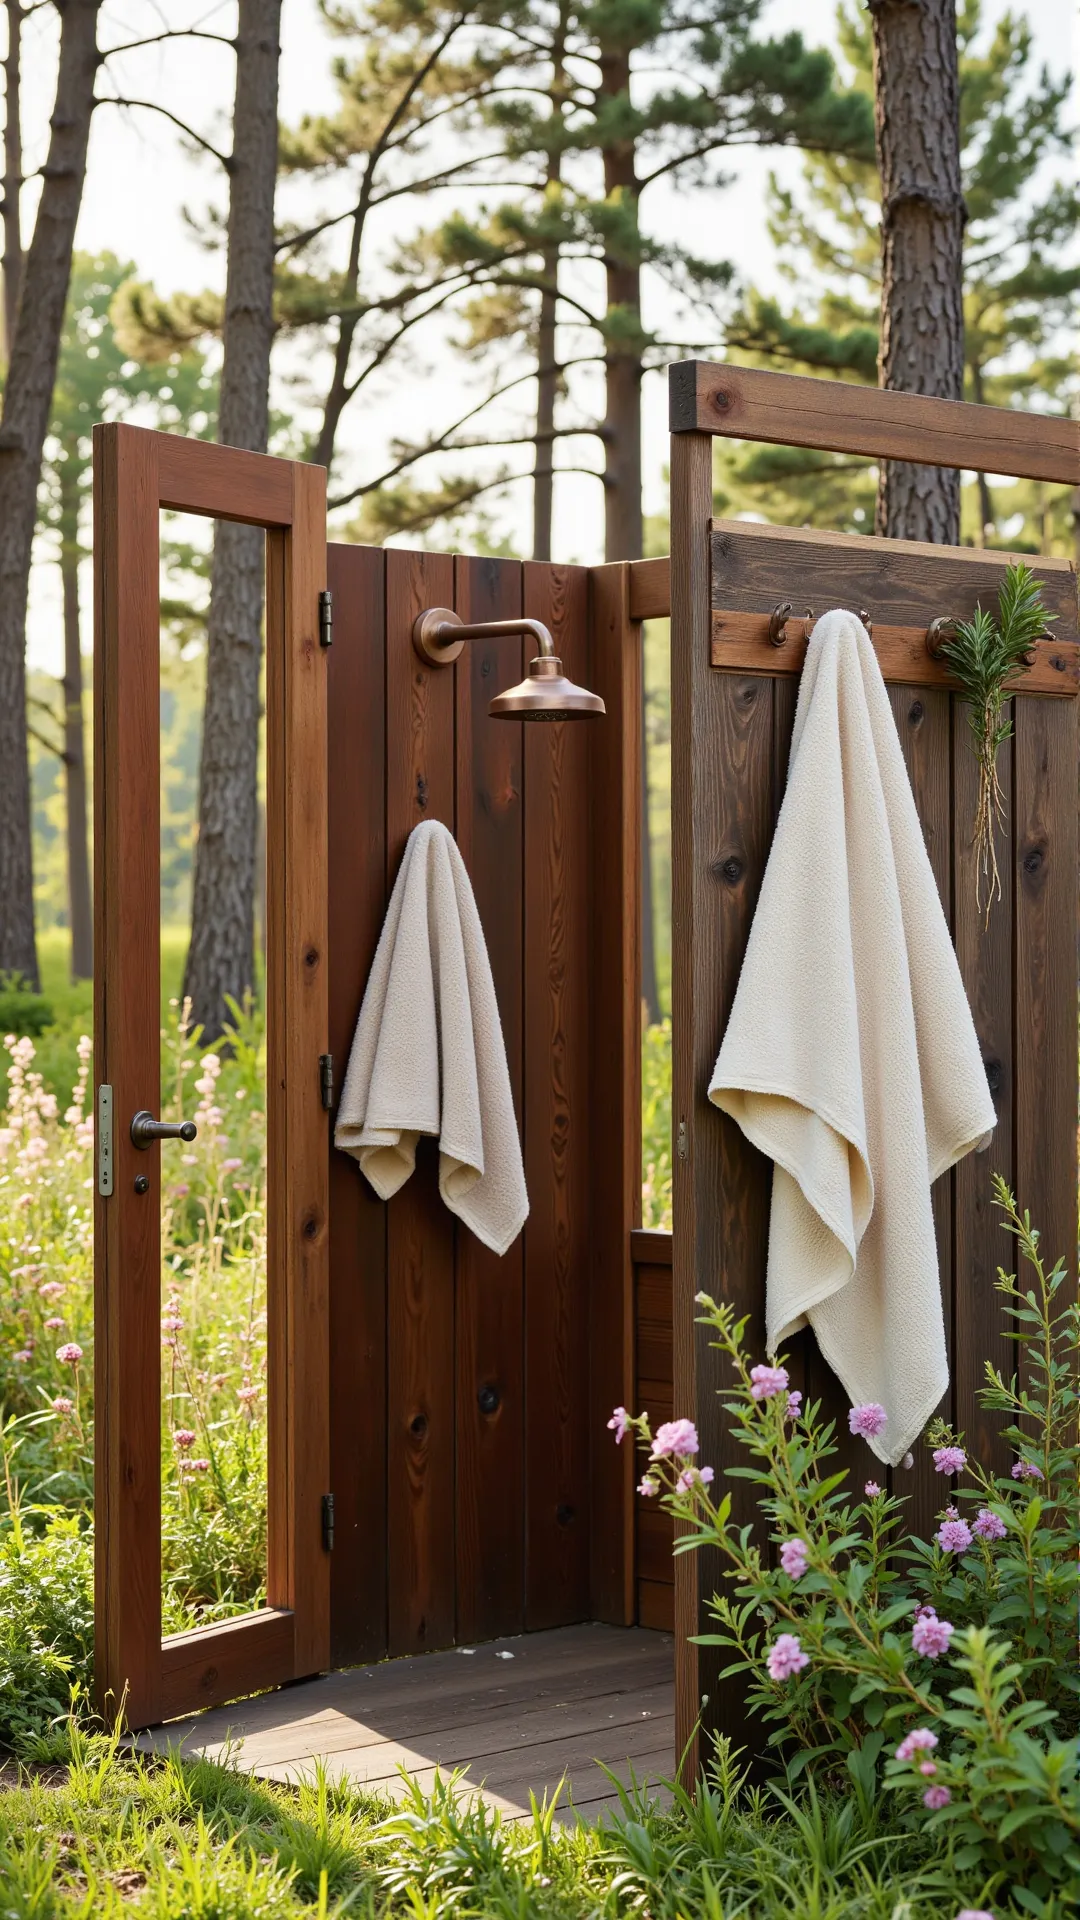
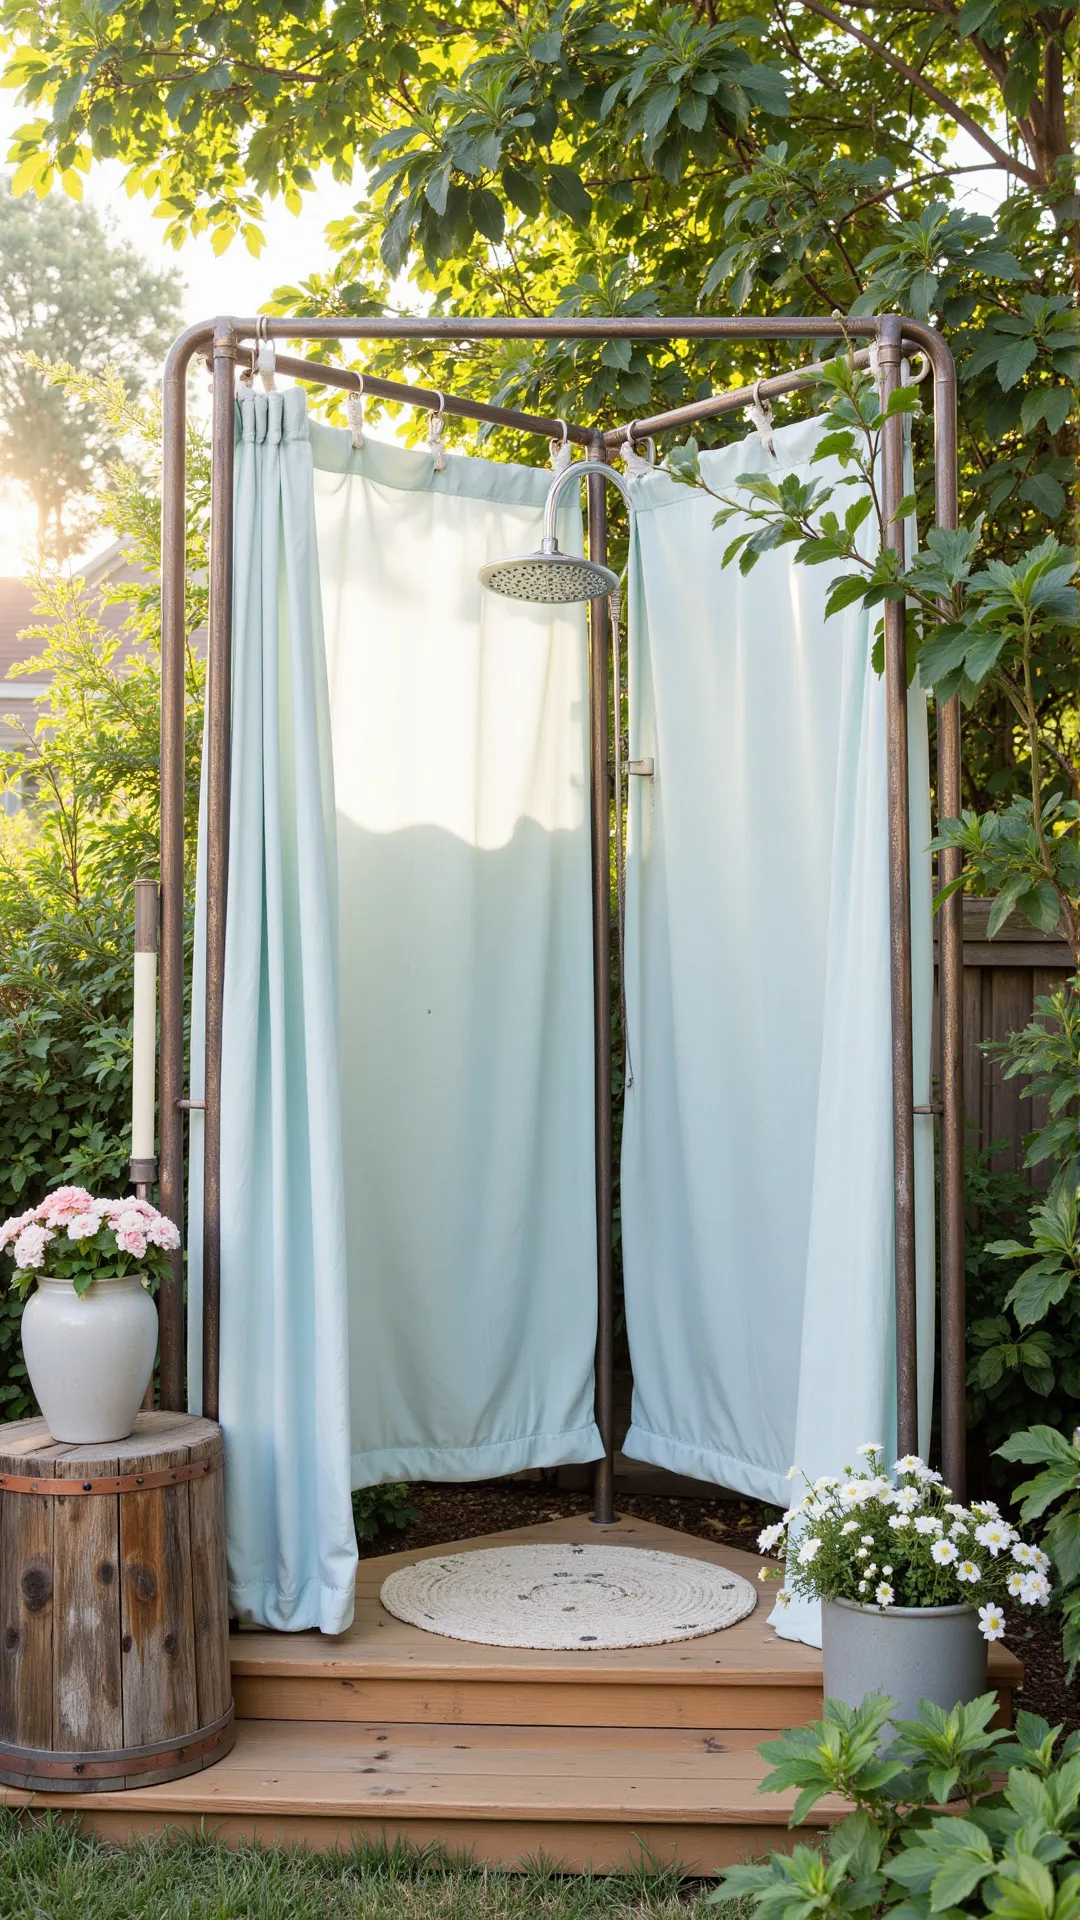
Using a Rustic Metal Shower Frame
Transform your outdoor space into a relaxing haven with a rustic metal shower frame, adding a touch of warmth and character to your alfresco oasis. By incorporating this charming element, you’ll create a cozy retreat that’s perfect for unwinding after a long day.
Adding a Rustic Metal Shower Frame Elevates Your Outdoor Oasis to a Cozy Retreat
- Instant Rustic Charm: Adds a touch of rural elegance to your outdoor space with its distressed metal finish.
- Weather Resistance: Keeps your shower frame sturdy and secure in harsh weather conditions, no matter the season.
- Easy Installation: Simple to set up and attach to your existing plumbing, so you can get to relaxing in no time.
- Sustainable Option: Made from recycled materials, a rustic metal shower frame is an eco-friendly choice for your outdoor oasis.
Installing Your Rustic Metal Shower Frame: A Step-by-Step Guide
-
Gather Rustic Metal Shower Frame Components
This involves collecting the frame, showerhead, and any additional decorative elements. -
Assemble the Rustic Metal Shower Frame
This step involves attaching the frame components together according to the manufacturer’s instructions. -
Install the Shower Frame in the Outdoor Setting
This step requires securing the frame to the ground or a nearby structure to ensure stability. -
Add a Showerhead and Water Source
This involves attaching the showerhead to the frame and connecting it to a water source, such as a hose or a rainwater harvesting system.
Now that you’ve incorporated a rustic metal shower frame into your design, it’s time to think about the finishing touches – like a showerhead that not only looks great but also helps to purify the water you’re washing with.
Adding a Showerhead with a Natural Filter
Imagine transforming your outdoor shower into a serene oasis that not only soothes your senses but also purifies the water you wash with. By adding a showerhead with a natural filter, you can elevate your outdoor space into a refreshing retreat that’s as clean as it is charming.
Rustic Charm Meets Clean Water: How a Natural Filter Showerhead Elevates Your Outdoor Oasis
- Cleaner Water: Reduces chlorine and other chemicals in water for a refreshing shower experience.
- Fresh Smell: Eliminates musty odors and leaves a refreshing scent in the air.
- Less Maintenance: Natural filters require less maintenance than traditional showerheads, saving you time and effort.
- Eco-Friendly: Helps reduce your environmental impact by using natural filtration instead of harsh chemicals.
Adding a Showerhead with a Natural Filter: A Step-by-Step Guide
-
Choose a Showerhead with a Natural Filter
Select a showerhead that incorporates a natural filter, such as a ceramic or charcoal element. -
Locate the Water Supply Lines
Identify the water supply lines leading to the shower area for easy access during installation. -
Install the Showerhead with Filter
Attach the showerhead with a natural filter to the existing shower arm, following the manufacturer’s instructions. -
Test the Filter’s Effectiveness
Turn on the water and test the showerhead’s water pressure and filtration performance.
Now that we’ve added a touch of eco-friendliness to our outdoor shower with a natural filter, let’s take it up a notch by incorporating a wood-burning stove into the shower area – imagine rinsing off under the stars with a warm, cozy glow.
Building a Shower Area with a Wood-Burning Stove
Imagine stepping into a warm, cozy outdoor shower on a crisp morning, surrounded by nature and the soothing sound of crackling flames. By incorporating a wood-burning stove into your rustic outdoor shower design, you can create a truly unique and inviting alfresco bathing experience.

Adding a wood-burning stove to your rustic outdoor shower design brings warmth, ambiance, and a cozy touch to your alfresco bathing experience
- Ambiance: Creates a cozy, rustic atmosphere perfect for a relaxing outdoor shower experience.
- Heating: Provides warmth on chilly days, making it ideal for year-round use.
- Energy Efficiency: Burns wood, a renewable resource, reducing your reliance on electricity or gas.
- Ambient Lighting: Warm glow from the stove adds ambiance and reduces the need for harsh outdoor lighting.
Building a Shower Area with a Wood-Burning Stove: Step-by-Step Guide
-
Marked the Area for Demolition
Identified the space where the shower area and wood-burning stove will be built. -
Removed the Existing Shower Structure
Took down the old shower and any surrounding obstructions to create a clean slate. -
Laid the Foundation for the Stove
Installed a level foundation for the wood-burning stove to ensure proper ventilation and safety. -
Installed the Wood-Burning Stove and Shower Components
Assembled and connected the shower area and wood-burning stove components for a functional and cozy space.
So, are you ready to get back to nature and wash off those worries under the open sky? Rustic outdoor showers are all about embracing the beauty of the great outdoors and bringing a sense of adventure to your daily routine. From reclaimed wood accents to lush greenery, we’ve explored the best design elements to help you create a shower oasis that’s equal parts functional and fabulous.
Don’t be afraid to get creative and make your outdoor shower a true reflection of your personal style. Whether you’re a fan of modern rustic or bohemian chic, the most important thing is to have fun with the design process and enjoy the freedom of showering under the sun (or stars!)!